Saturday, March 29, 2014

My First Eggless Orange Loaf Cake


I have been wanting to make eggless cake for the longest time now.The impetus for this cake came from my Daughter's recent birthday celebration. I wanted to make cake-pops for her birthday. I also wanted to have vegetarian options for my vegetarian friends. I hate it when I go to a party and there is nothing for me to eat! I therefore make sure that I check the food preferences, allergies of all my guests and ensure that each one of my guests has adequate options in food.

Coming back to this cake, I came across this again on CAL, a group I sooo love! The recipe was posted by Kavita Balajee. You can find the original recipe here.The original recipe called for a 9 inch cake pan. I didn't have one. So I decided to try it in my loaf pan.I figured that if it didn't come out moist and tasty, I was going to destroy and use it to make cake pops hence had nothing to worry  about!

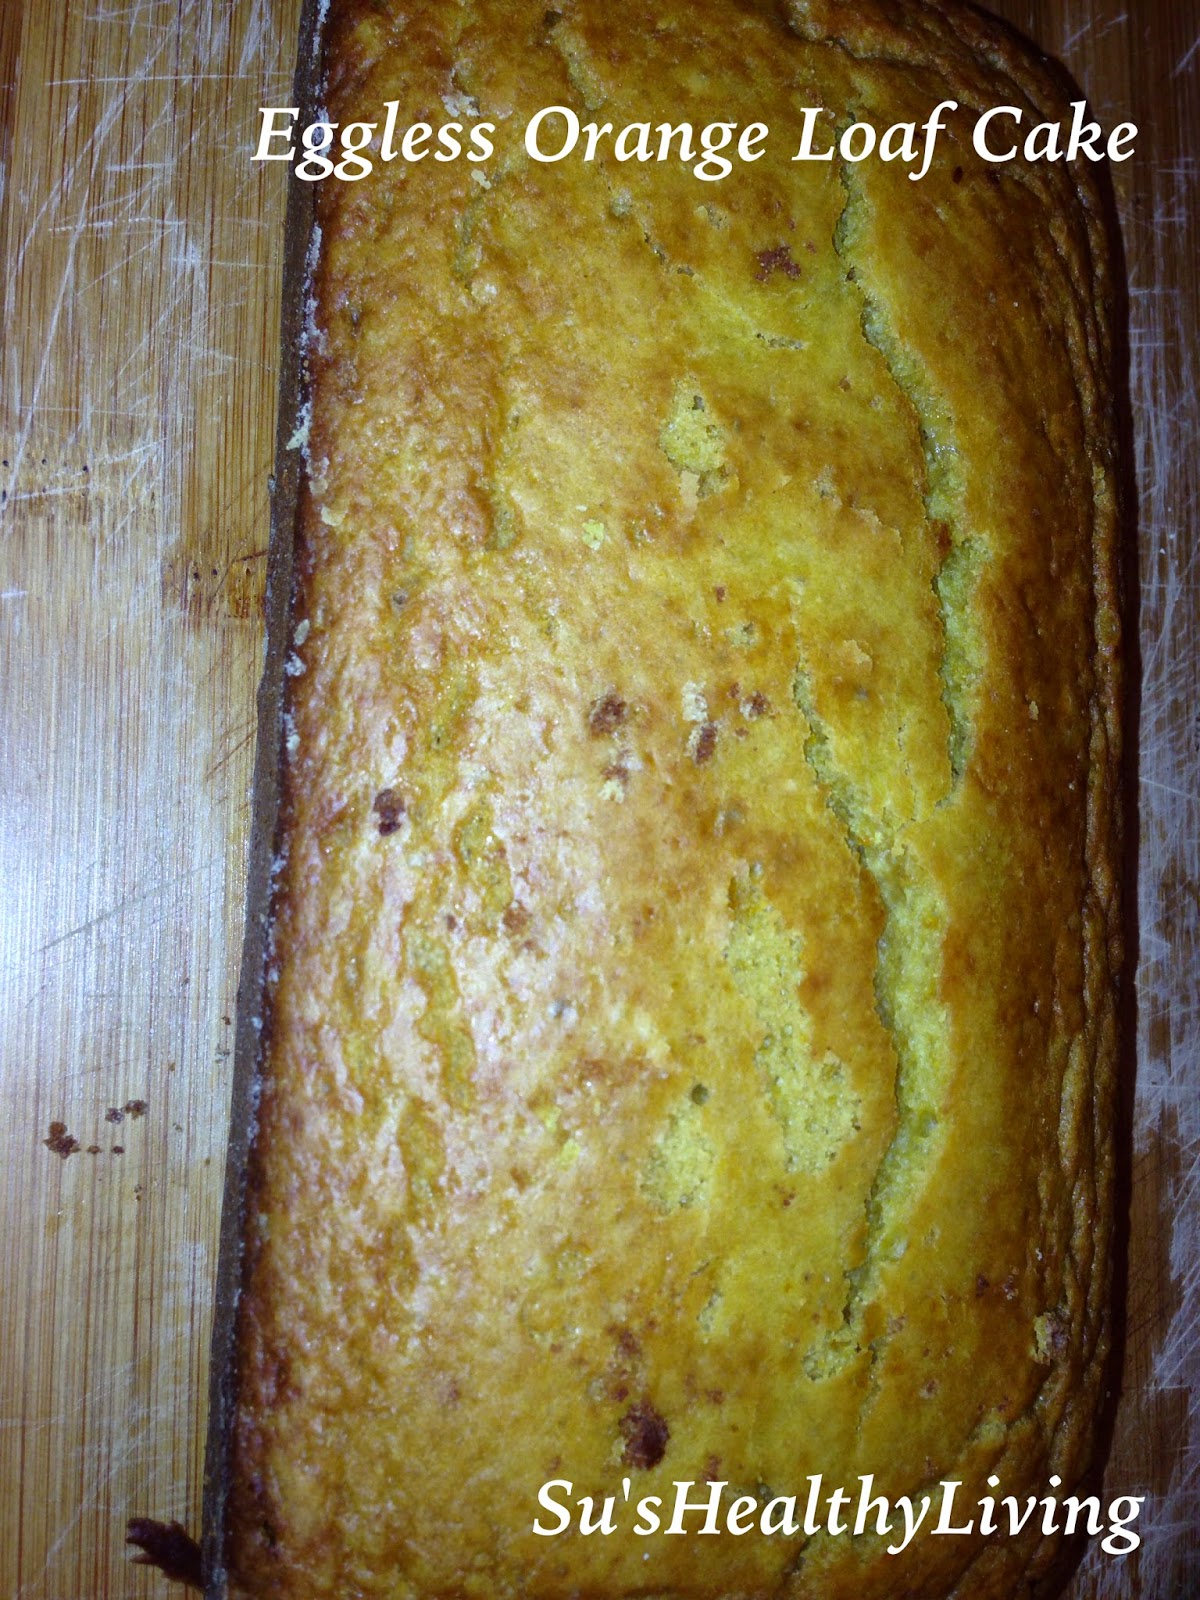
I could not have been more wrong! The cake came out so moist, pretty an tasty that I didn't have the heart to destroy it. In fact, a pregnant friend of mine, Rene, was visiting me with her family that weekend and I gave her a piece. She liked it so much that the others ate it and I gave her some to take home. The cake was gone! I had to bake another one for my cake pops! I will soon put up the recipe for cake pops.

The recipe is very easy and does not take much time to make. I would strongly urge you to definitely try it out. If you do, please let me know how it turned out. You can even send me pictures and I will put it up on this blog.


Servings: 6


Ingredients:


All purpose flour: 1 cup + 2 tbsp
Corn flour: 3 tbsp
Baking powder: 1/4 tsp
Baking soda: 1 tsp
Brown sugar: 1/2 cup
Oil: 1/3 cup ( any cooking oil, I used olive oil)
Orange juice: 1 cup
Orange zest: from 1 medium orange
Vanilla essence: 1 tsp
Vinegar: 1 tbsp
Salt: a pinch

Method:

Preheat the oven to 350 degree F.

Prepare the loaf pan by greasing it with butter and then sprinkling flour on it. Invert the pan and shake the excess flour off the pan. Keep it aside.

Mix all purpose flour, corn flour, baking powder, baking soda, brown sugar and salt together in a bowl. Mix it well and keep aside.

In another bowl whisk together the orange juice, orange zest, oil, vinegar and vanilla extract. Whisk well. Now slowly add the dry ingredients to the wet ingredients and mix slowly to produce a smooth batter. Ensure that you do not over mix. This is important as over mixing can result in a flat cake!

Pour the above batter into the prepared loaf pan. Tap the pan gently on the counter to remove air bubbles.Place it on the middle rack of the oven and bake for 25-30 minutes. Check towards the end to see if the cake is done using a toothpick. Insert a toothpick into the center of the cake. The toothpick should come out clean!


Take it outside the oven and let it cool for 10 mins before removing from the pan. Cut it into slices and serve.


Enjoy!

Cooking made easy:


The kitchen timer is my best friend in the kitchen.I use the timer a lot. This lets me do other things and not forget what's in the oven or on top of the stove.


Tip for healthy living:


A homemade face pack can help rejuvenate the skin of your face.

In a small bowl, mix together 1 tbsp besan( chick-pea flour) , 1/4 tsp turmeric powder, 1/4 tsp honey and 2 tbsp milk to make a smooth paste. Apply this to your face avoiding the skin around the eyes. Leave it on for 10-15 mins and then rinse your face with cold water. Chick-pea flour helps clean the skin, turmeric is an antiseptic that helps prevent pimples, honey acts as a natural bleach and milk moisturizes the skin.

Food for thought:


If you have nothing good to say, say nothing at all. ( Unknown).

Thursday, March 27, 2014

Spicy Eggplant


My husband loves eggplant and I am always on the lookout to make different varieties of eggplant dishes. Other day I came across this very nice recipe for badane gojju posted by Sangeetha. She blogs at http://enelm.blogspot.com/. Being that I am a kannadiga, I am a little partial to these dishes. I liked that it was quick and easy to make with very few ingredients. I decided to give it a try.I didn't want it mushy, so I didn't make it mushy. Instead of sambar powder, I used rasam powder as I have lots of rasam powder in my pantry which I don't use much. My husband loved it! Here is the recipe with my twist on it.

Servings: 4


Ingredients:


Eggplant : 1 medium-sized, diced medium.
Cooking oil: 2 tbsp
Curry leaves: 1 sprig
Green chillies: 2 slit lengthwise.
Turmeric powder: 1/2 tsp
Rasam powder: 1 tbsp
Tamarind pulp: 1/4 tsp ( if using dried tamarind, use marble sized ).
Jaggery/ brown sugar: 1 tsp
Salt: 1 tsp

Method:

Heat oil in a skillet/ frying pan on medium heat.


Add the diced eggplant and sauté for 2-3 mins. 

When the eggplant seems a little wilted, add turmeric powder, slit green chillies. Sauté on low heat until the eggplants are half-cooked.

Now add the tamarind, jaggery, salt,rasam powder and curry leaves and sauté for 2 mins. 

Add 1/2 cup water and let it simmer until the eggplant is well-cooked.

Serve hot with rice/ roti/ bread.

Enjoy!

Cooking made easy:

When you cut eggplants, place the chopped pieces in cold water that has a pinch of salt added to it. This prevents the eggplant from getting discolored.

Tip for healthy living:


In the morning upon waking, wash your face lightly.The oil in the skin after sleeping is actually beneficial for the good health of the skin. This oil nourishes the skin, keeps it supple and young. When you wash this oil off, you are actually drying your skin.

The best time to wash your face thoroughly is in the evening/ night when you come home from outside. It is essential to cleanse your face free of the dirt/dust and grime. Never leave make-up on and go to sleep.

Food for thought:


The roots of education are bitter, but the fruit is sweet.Aristotle

Tuesday, March 25, 2014

Kele Upkari ( Raw Banana/ Plantain Stir-fry)


There is a particular variety of banana/ plantain that is used exclusively for cooking. I am not sure whether to call them bananas or plantains. We from South Kanara call it Randayi Kele( meaning curry banana)zIt is used when raw to make side-dishes. These are also known as Rollo bananas.


I have never known them being used when ripe.When I was little, i remember my mother growing them in our backyard. I am thankful to my mother for familiarizing me with all the flowers , fruits and vegetables. There was rarely a thing that my mother didn't grow in our yard! Coming back to raw bananas, I often make this dish as it is quick and easy to make, tastes delicious, is packed with nutrients and fiber and most importantly my kids love it!

Servings: 4


Ingredients:


Raw bananas ( Rollo variety): 2 medium
Cooking oil: 1 tbsp ( I use coconut oil)
Garlic: 6-8 cloves ( chopped big and crushed)
Dried Red chillis: 2-3 ( depending on your spice level and that of the chilli).
Salt: 1/2 tsp

Method:


Wash the banana.


Using a sharp knife gently peel the rough outer fibrous green skin of the banana. ( once peeled, if kept in air for too long, the banana turns dark).


Chop the banana into small pieces and keep aside.


In a skillet/ wok , heat oil on medium heat. 

Add garlic and sauté for a minute until you smell the aroma of the garlic. 

Now add the chopped bananas. Sprinkle a little water. Reduce the flame to low. Cover and cook until done( not mushy),stirring in between to make sure it does not stick to the bottom of the skillet/pan. Generally takes around 15 mins.


Cooking made easy:


If you want to cook the above dish faster add 1/4 cup water to it and cover and cook. It should be done in 8-10 minutes.

Folks in India will have to use 1/4-1/2 cup of  water as vegetables in India tend to be firmer and take longer to cook.

Tip for healthy living:


To prevent wrinkles on your face,avoid using soap to wash your face. Soap dries up the skin and makes it more prone for wrinkles.Use a non-soap based cleanser to wash your face.

Food for thought:


We are what we repeatedly do. Excellence, then, is not an act, but a habit. Aristotle

Monday, March 24, 2014

Meatless Monday Masala Chai ( Masala Tea)


Tea is my "go-to" in the evening when I come home tired after work. Out of all the Masala Chais I have had, my husband makes the best. This is one of my few luxuries: drinking a cup of husband-made tea in the evening! He makes it with all fresh ingredients and is absolutely refreshing and energizing ! This cup of tea gets me ready for my second shift;).
I like my tea freshly brewed from tea leaves, strong and thick with lots of milk. I do not like my tea bitter. I cannot stand tea made from tea-bags. They are too limp. Incidentally, since I gave up milk a year ago, I use almond milk in my tea. The best almond milk that gives me the taste closest to that of regular milk is the brand Almond breeze. Next comes Silk. None of the other brands match up. The only thing with almond milk is that to get the same taste as tea with regular milk, for each cup of tea, half of it has to be almond milk.
Here is my hubby's Chai recipe.

Servings: 2


 Ingredients:


Water: 2 cups
Tea leaves: 2 tsp black tea leaves of good quality.
Ginger: 1 inch, chopped
Cinnamon: 1 cm
Cloves: 3 nos
Cardamom: 2 nos
Jeera(Cumin seeds): 10 nos
Black pepper: 2 nos, freshly ground.
Milk: 1/4 cup, warmed( can add more if you wish)
Brown sugar: 2 tsp per cup( can modify as per taste.

Method:


In a saucepan place ginger, cardamom, cinnamon, clove, jeera, and black pepper.


Add 2 cups of water and bring it to a boil.


Once it boils, reduce the heat and let it simmer for 3-4mins.


Now add the tea leaves, simmer for a minute more. Turn off the heat.


Cover the pot and let it sit for 5 mins.


Divide the milk between the two cups. Add sugar to each cup. Now strain the tea and add it to the cup. Stir well.

Serve with some tea-biscuits or tea-rusk or something savory like samosa.


Enjoy!

Cooking made easy:


Even though freshly brewed tea tastes the best, tea could be brewed a few hours ahead of time.It can even be left outside overnight.It does not need to be refrigerated. Warm it up at the time of serving, add milk and sugar as needed and serve.Black Tea does not go bad. It is only when milk has been added to it and has been left outside that it goes bad.

Tip for healthy living:


For centuries, different teas have been consumed for their health benefits. This of course depends on the type of tea. A book could be written on this topic.There are a myriad of  herbal and then we have the regular black & green teas.

Both black & green teas come from the same plant. Black tea is just tea leaves that have been oxidized more( left exposed to the air more).

Black tea has more caffeine than other teas and therefore makes you feel more alert. Black tea also contains a stimulating substance known as theophylline that also helps us in feeling more alert. Black tea contains substances called polyphenols & catechins which are antioxidants and helps protect cells from DNA damage and thereby maybe prevent atherosclerosis and some types of cancer.Black tea is also supposed to be beneficial in lowering the risk of diabetes, high cholesterol, kidney stones, Parkinson's disease, osteoporosis and lung cancer.

Food for thought:


A friend of all is a friend of none. Aristotle

Friday, March 21, 2014

Pineapple- Blackberry Upside-Down Cake


For the longest I have been wanting to make Pineapple Upside-Down Cake. A few weeks ago Nithya Krishnan, a member of the Chef at Large group had posted a picture of the upside-down cake that she had made. She was also gracious enough to provide us with the link to the recipe that she had followed. It was a recipe by Trisha Yearwood on Food Network. I looked at that link and at another recipe that I had seen and compared the two. I decided to modify Trisha Yearwood's recipe and make the cake. In my home there is an abundance of fresh fruits at all times. I do not use canned fruits. Hence,instead of canned pineapple, I have used fresh pineapple instead of canned and blackberries instead of cherries.I have to confess though that the berries gave the pineapples a star-burst appearance which some may not find aesthetically pleasing.I have also used coconut oil instead of margarine and reduced the amount of butter used.You can find the original recipe here. When I made the batter, I worried that the batter was too thick and that it may not be enough for the pan I used instead of the square 8 inch x8 inch pan that the recipe called for. I had to literally spread the batter over the pineapples so that they all could be covered. This had me worried that the cake layer would be too thin. I figured, if not a cake, I might just end up with a pie.In the end though, I realised that I worried needlessly. The cake was soft, fluffy and the right thickness. The taste was delicious with the right amount of sweetness. My colleagues said it was Purrfect! The cake was gone in no time! That was good for someone who made it the for the first time. I  would definitely make this again. I am also looking forward to making an eggless version of it.


Servings: 8


Ingredients:


Pineapple: 1/2 pineapple sliced into rings( about 6-8 rings), central core removed.
Blackberries: 10-12
Brown sugar: 1/2cup
Butter : 2 tbsp
Flour : 1 1/2 cups
Baking powder: 2tsps
Salt: 1/4 tsp
Egg: 1 large
Coconut oil: 1/3 cup
Sugar: 2/3cup
Vanilla essence: 1 tsp
Milk: 2/3 cup

Method:


Heat the oven to 350 degree F.
Place a baking pan ( I used a 13 x 9 pan, you could use a smaller pan for thicker cake)on low heat on the stove, add butter. When the butter is just melted, turn off the flame. Sprinkle brown sugar. Now place the pineapple rings in a single layer completely lining  up the bottom of the pan. Fill the center hole of each pineapple with blackberries. Keep it aside.

Sift together flour, salt and baking powder. Keep aside.

Beat together coconut oil, egg,vanilla and sugar until the sugar has completely dissolved and the mixture is creamy. Now fold into this mixture flour and milk alternatively in batches,mixing gently. Be careful not to overmix.

Pour this batter over the pineapple-berries, making sure that the pan is completely covered.

Place on the center rack of the oven and Bake for 25-30 mins at 350 deg F. Test with a toothpick to check if it is done. It should come out clean.

Let it cool for 10 mins. Using a knife loosen it from the sides of the pan. Place the serving tray on top of the pan and gently overturn it. Leave it like that for 5mins. Then cut and serve! 


Enjoy! 


Cooking made easy:


There was a time when I used to hesitate to bring whole pineapple home as I used to find cutting it an extremely tedious process. Not anymore! Cutting a pineapple is actually very easy. Here are the steps:

1. Cut the leafy crown of the pineapple, discard it.
2. Now keep it upright on the cutting board and with the knife shave off the peel using vertical strokes, turning the pineapple in a clockwise motion.
3.Now cut the pineapple into 2 halves vertically.
4. Cut each half again vertically into 2 equal halves.
5. Vertically slice off the central hard portion of each quarter.
6. Now place each quarter horizontally and cut it into bite size pieces.

 If you want to slice it into rings, after step 2, place the pineapple horizonatlly on the cutting board and cut it into rings of desired thickness. Remove the central core.

I shall definitely take pictures and add them to this post next time I cut a pineapple.

Tip for healthy living:


Eating pineapple 2-3 hours after a meal is supposed to help burn off belly fat and bloating. This is due to the presence of Bromelain in pineapple that is supposed to help digest proteins. Bromelain is also supposed to have anti-inflammatory properties and helps relieve arthritis pain. Pineapple is a rich source of vitamin C which is known to help with the immune system. Elderly Indians believe that pregnant women should avoid pineapple as it promotes miscarriage/ labor. Why? I have not been able to find any articles stating the reason.


Food for Thought:


Every action has an equal and opposite reaction.(Sir Issac Newton).

Wednesday, March 19, 2014

Chilli Chicken


My foray into cooking Chinese cuisine is thanks to my cousin Ashita Didi. Everything I did before that is insignificant, irrelevant ! It all began with our get-together at my other cousin Geetanjali's place in Michigan. My aunt and uncle were visiting so we all decided to come together and spend some quality family time over a long weekend. That weekend changed my way of cooking Chinese food forever! Thank you for that Ashita didi!

Servings: 4


Ingredients :


Boneless chicken breast: 1 lb cleaned and cut into bite size pieces ( my pieces in the picture are a little bigger than what I would have wanted as I had made them with another dish in mind but ended up using them for this!).

For marination of chicken:
Soy sauce : 1 tbsp
Lemon juice: 1 tbsp
Corn flour: 1 tbsp
Black pepper powder: 1 tsp
Salt: 1 tsp

For the sauce:
Onion: 2 medium, diced, big
Garlic: 6-8 small cloves,chopped julienne
Ginger:2 inch piece,chopped julienne
Green chillies: 4-6 ( depending on your spice level and the spice level if the chilli ), chopped fine
Capsicum/Green Bell pepper: 1 large , diced big.
Soy sauce : 1 tbsp +4tbsp
Vinegar: 1 tbsp
Corn flour: 1 tbsp+ 1 tsp
Spring onions : 1 bunch, chopped fine
Cooking Oil : 3 tbsp+ 2 tbsp
Water : 1 cup( optional)
Salt to taste
Sugar: pinch


Method:


Marinate chicken with 1 tsp salt, 1 tbsp soya sauce,  1 tbsp lemon juice, 1 tsp black pepper powder, 1 tbsp corn flour. Mix well and keep aside for atleast 20 mins in the fridge.

Mix  1 tsp corn starch and  4 tbsp soy sauce and keep aside.

Heat a wok on high heat 3 tbsp oil. Fry  the marinated chicken in a single layer and keep aside in a plate/ dish. You might need to fry it in batches depending on the size of your wok. Chicken breast cooks pretty quickly when done on high heat. Make sure that you don't overcook or undercook your chicken. If overlooked, the chicken will be dry. If undercooked most likely you will get a tummy upset!:(. How do you know the chicken is done? It generally turns white and when you cut it in the middle it should not be pink!


Heat the same wok on high heat,add the remaining oil. When the oil  is hot, add garlic , then ginger. Sauté for 30 secs, then add chopped onions, sauté for 2 minutes.Now add green chillies, then bell pepper and sauté for another minute.Now add the cooked chicken,cornstarch-soy sauce mixture and mix well. Add salt as needed, pinch of sugar and vinegar. Add 1/2- 1 cup water and mix well if you don't want it dry.Let it cook for 3-4 mins.

Garnish with finely chopped spring onions/ scallions.


Serve with hot jasmine rice!


Enjoy!

Cooking made easy:


I have said this before, when you bring home chicken from the store, before dumping it into the freezer, try cleaning it and applying a basic marinade of lemon juice, salt and pepper and then freeze it in batches in small plastic containers or freezer bags.This way you can pull out a bag, thaw it and cook chicken anytime you want without having to spend additional time cleaning, marinating etc. Dinner is ready!

Tip for Healthy Living:


Today, lets discuss organic vs regular chicken. So, how is organic chicken different? Organic means that the chicken has been fed organic feed, given outdoor access and has not the use of antibiotics has been avoided. Organic feed means grains that are not genetically modified and grains whose crop has not been treated with synthetic pesticides.This means that these chicken have less chemical residues in their bodies and therefore are more healthy. Whenever possible it is best to use organic chicken. 


Food for thought


Tomorrow is not guaranteed for anyone! ( unknown).


Monday, March 17, 2014

Meatless Monday Garlic Sautéed Spinach With Slivered Almonds


This is a really long name for a simple dish with very few ingredients. This dish was inspired by a dish by the name of " Catalan Spinach". I came across this dish in allthatsdelicious, a blog by Priyadarshini. Once I saw this , the name " Catalan spinach" kept going in circles in my head. It was as if I was haunted by the name. The funny part is that I had not even paid attention to the recipe. After days of being haunted, I decided to give this ghost a rest. I went looking for the blog and the recipe. Once I looked at it, I liked what I saw and decided to give it a try. I of course didn't have all the required ingredients and being a firm believer in using what is available in your kitchen, I modified the recipe. The end result was this quick,simple  yet amazingly tasty dish.

Servings: 4


Ingredients:


Spinach: 1 bunch
Olive oil: 1tbsp
Butter: 1 tsp
Garlic: 6 cloves chopped and then lightly crushed.
Almonds:6 -8 slivered
Red Raisins: 1 tbsp
Chilli pepper flakes: 1/2 tsp
Sugar: 1/2 tsp
Salt: 1/2 tsp
Vinegar: 1tsp

Method:


Clean the spinach thoroughly to get rid of any residual sand. Boil 4 quarts water with 1/2 tsp salt. Add the spinach to boiling water. Let it cook for 3-4 minutes.

Then blanch it by putting it in cold water, drain and keep it aside.

Heat a sauté pan/ frying pan on medium heat. Add the butter and the olive oil.

Now add the garlic and sauté  until you smell the fragrance of garlic. 

Add the raisins, chilli flakes and slivered almonds. Sauté until they turn a little brown. 

Now add the drained spinach, sugar,vinegar an sauté for 3-4 minutes until the spinach is warm. 

Add salt as needed.

Serve warm with hot rice/ bread/ baked fish/ bake chicken.

Cooking made easy:


To clean greens effectively ,soak them in cold tap water with a few drops of vinegar for 3-5 minutes. This will make the sand/mud/dirt in the green settle at the bottom.Then rinse couple more times . Chop the greens after cleaning them. This ensures that you don't lose the essential nutrients and vitamins.

Tip for healthy living:


All fruits and vegetables are best cleaned by soaking it for 2-3 minutes in cold water with a few drops of vinegar. Then rinse and air-dry them.


Food for thought:


Once bitten, twice shy.(unknown).


Thursday, March 13, 2014

Idli Usli ( Idli Upma)


Whenever I make idli batter,I generally make double the amount of batter than needed for one breakfast and make extra idlis so that I can make idli upma the next day for breakfast. It is absolutely yummy especially with lots of green chillies finely chopped and fried and the distinct appetizing aroma of asofoetida (hing).

Servings: 4


Ingredients:


Leftover idlis: 12 nos, crumpled fine but not mushed.
Coconut oil: 1 tbsp
Mustard seeds: 1/2 tsp
Curry leaves : 1 sprig
Urad dal: 1/2 tsp(optional)
Green chillies: 3 chopped very fine
Asofoetida( good quality): a pinch
Shredded coconut: 2 tbsp
Salt :1/4 tsp
Sugar: 1/4 tsp

Method:


Heat oil in a sauté pan/ wok on medium heat. Add mustard seeds and splutter them. Now add urad dal, curry leaves and slit green chilies  and sauté until the urad dal turns a little golden color ( don't let it burn). Reduce the flame to low and add the powdered idlis, salt and asofoetida. Sauté for 4-5 minutes on low heat until the idlis are a warm and you smell the nice aroma of slightly fried idlis. Now sprinkle the sugar, shredded coconut and mix well.


Serve warm. Enjoy by itself or with some chips or any numkeen.


Cooking made easy:


My husband loathes plain one texture food items. He likes his food to be colorful. To achieve this, my variation of  the above Usli is the  UPMA with the addition of cooked green peas just before adding the powdered idlis. This addition of veggies is also helpful with kids so that they get their vegetable intake in one dish.


Tip for healthy living:


Try to add as much variety into the foods. Variety means colors and colors means variety. When your plate is colorful and has variety in it you have a nourishing diet. Every color in food is significant as it contributes a different nutrient to our body. By being colorful, you get as many nutrients in one meal as possible.

Food for thought:


Life is unpredictable. ( unknown).